Step-by-step guide to importing NFTs from MetaMask to Immutable Passport

As the NFT market continues to grow, users are looking for efficient ways to manage their digital assets across a variety of platforms. According to Immutable.com, a detailed guide has been released to help users transfer NFTs from MetaMask to Immutable Passport.
Prerequisites for NFT transfer
To successfully transfer an NFT from MetaMask to Immutable Passport, users will need the following:
- An Immutable Passport account (sign up here).
- This is the MetaMask wallet address where the NFT is stored.
- $IMX tokens in MetaMask’s zkEVM to cover gas costs (tutorial on earning $IMX)
memo: Before starting your transfer, make sure you have enough $IMX available for gas costs.
Step-by-step transfer process
Step 1: Access your immutable passport
First, visit the Immutable Passport website (https://passport.immutable.com/).
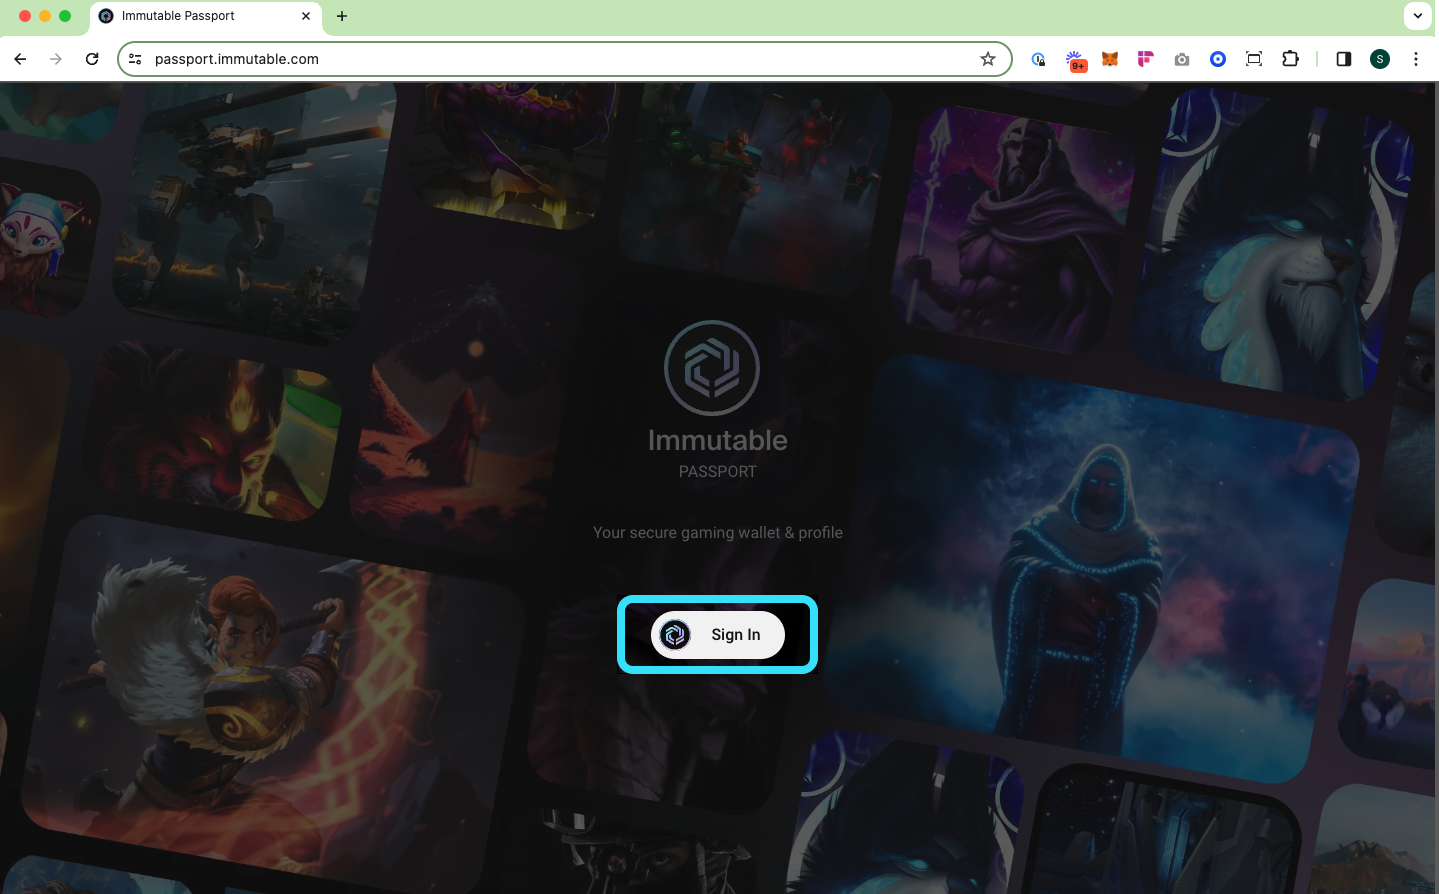
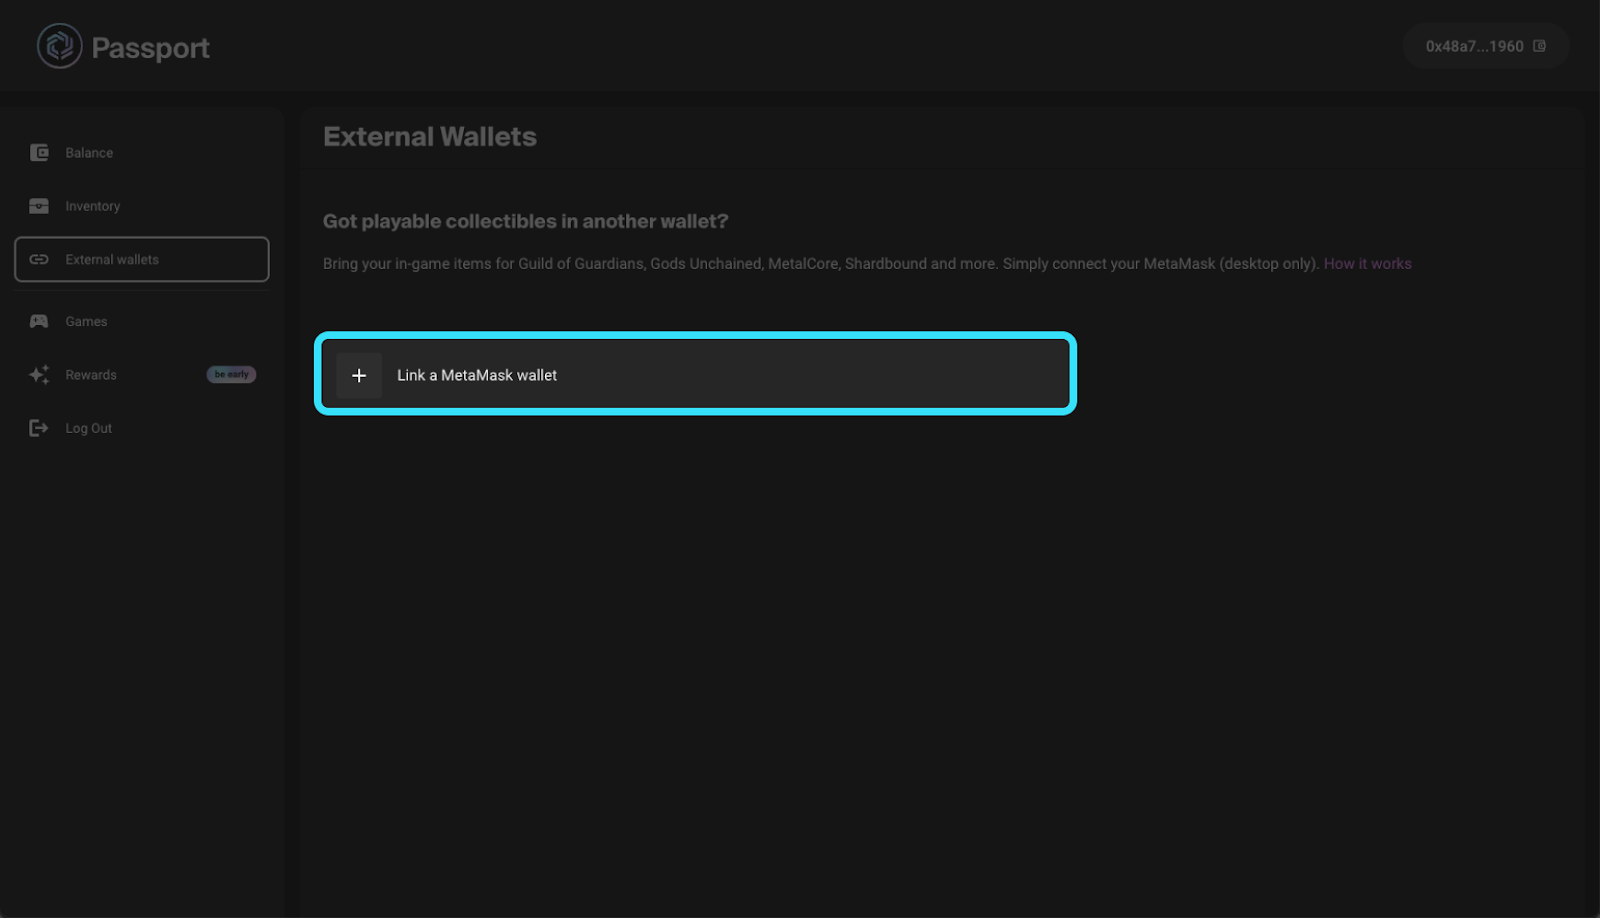
Step 2: Connect your MetaMask wallet
Connect your MetaMask wallet to Immutable Passport and select “Import items to Passport”.
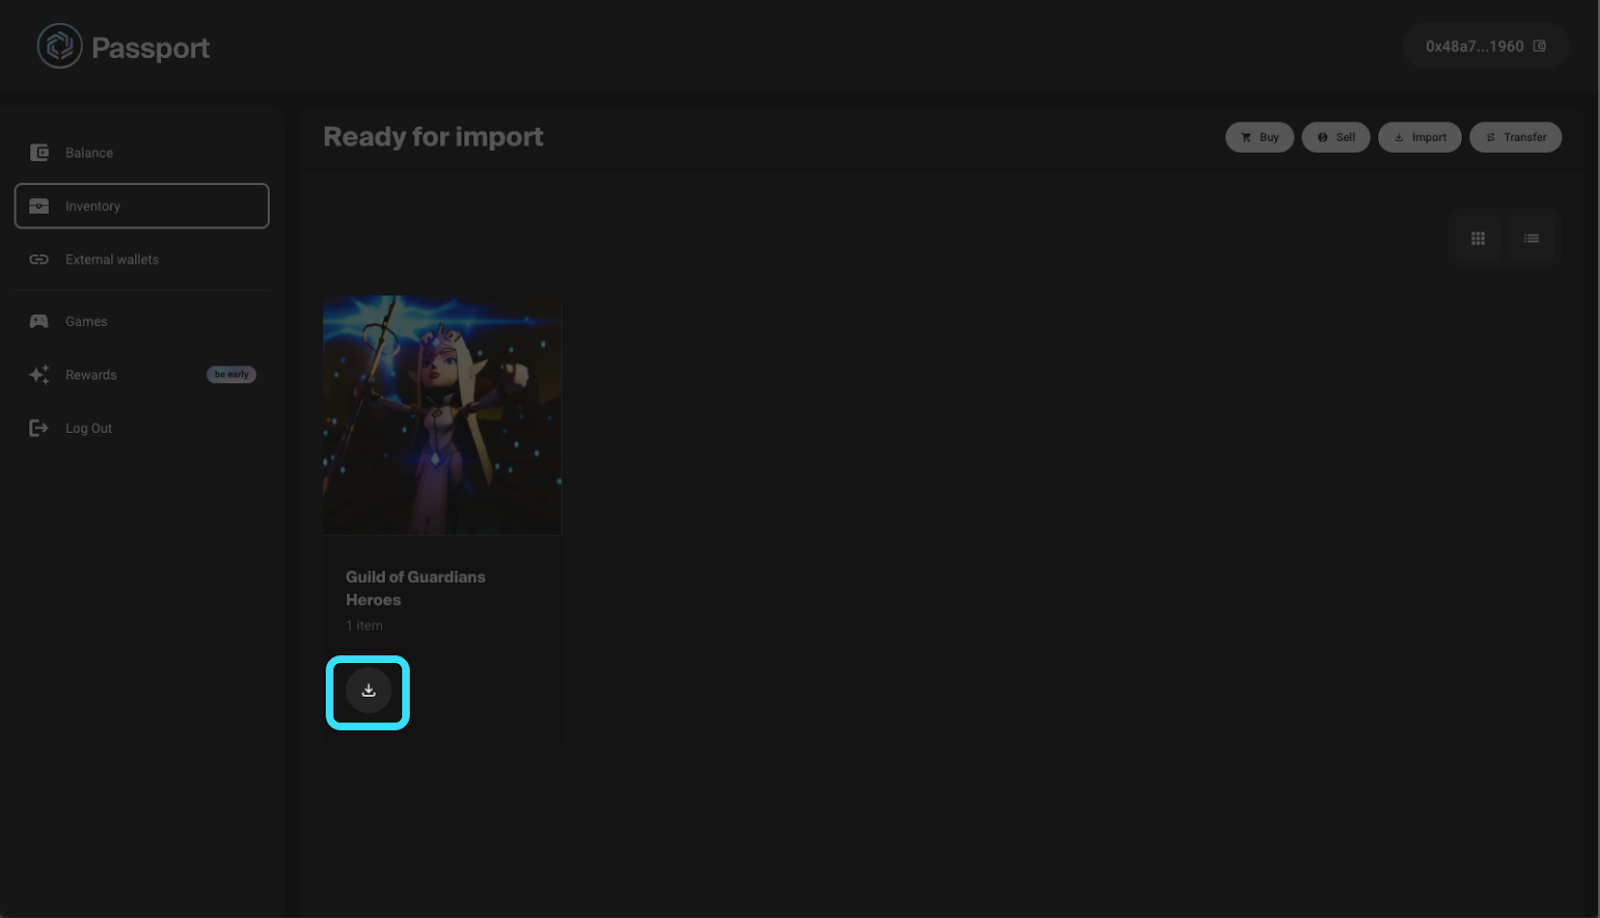
Step 3: Choose the NFT you want to import
When you connect, your inventory will automatically pop up. Select the collection and specific items you want to import.
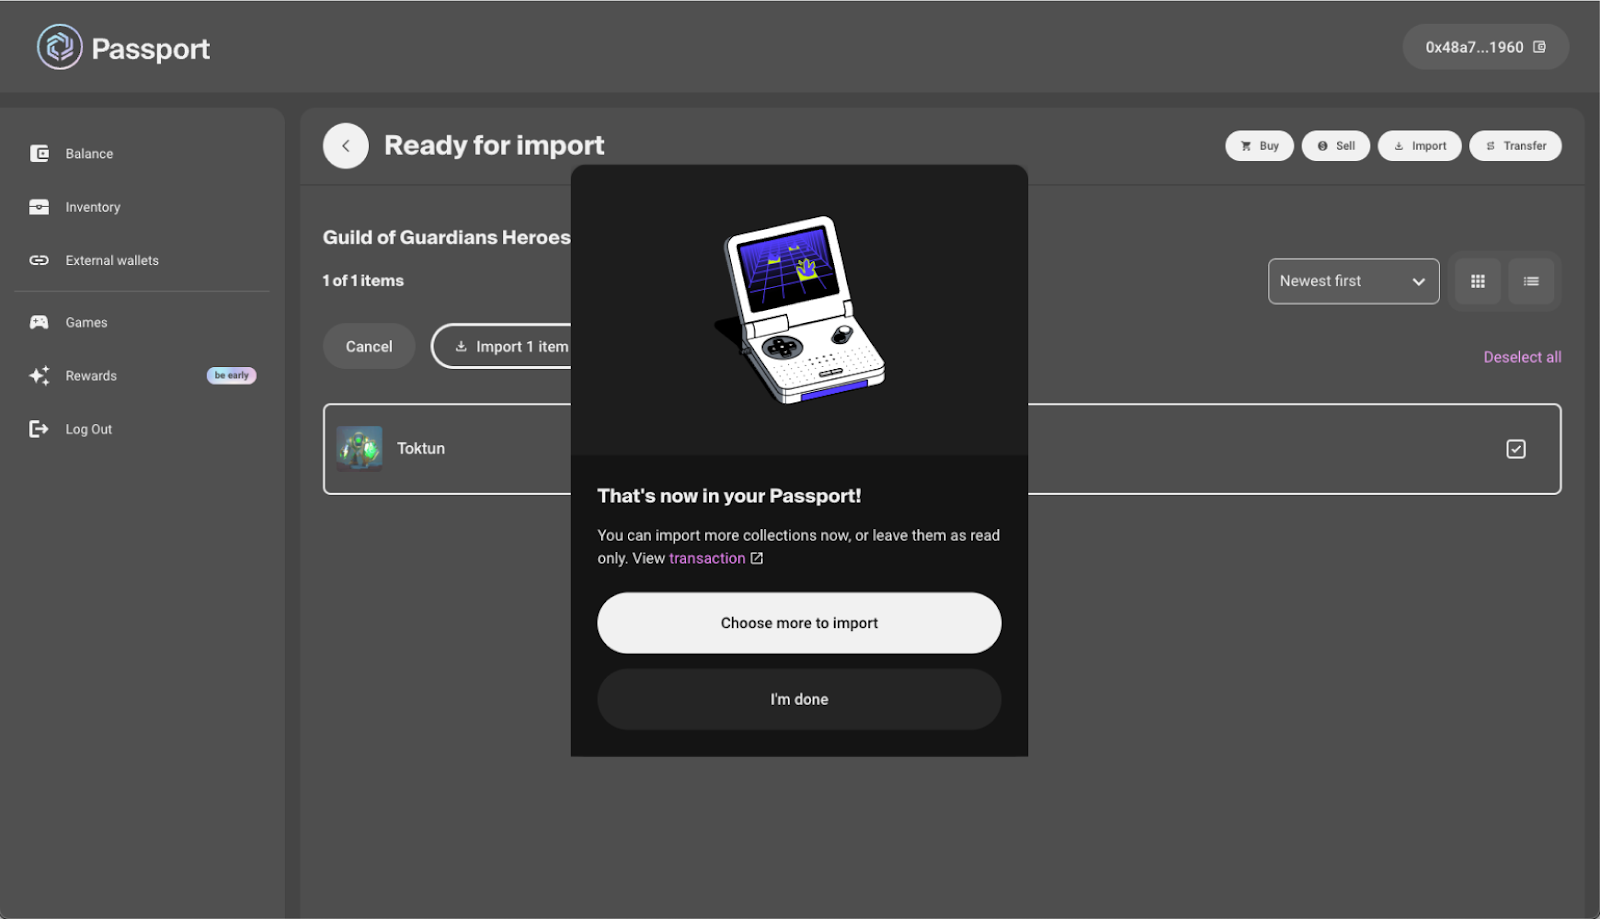
Step 4: Confirm Import
Select ‘Import Item’ and sign the transaction from your wallet. Make sure you have enough $IMX to cover gas fees.
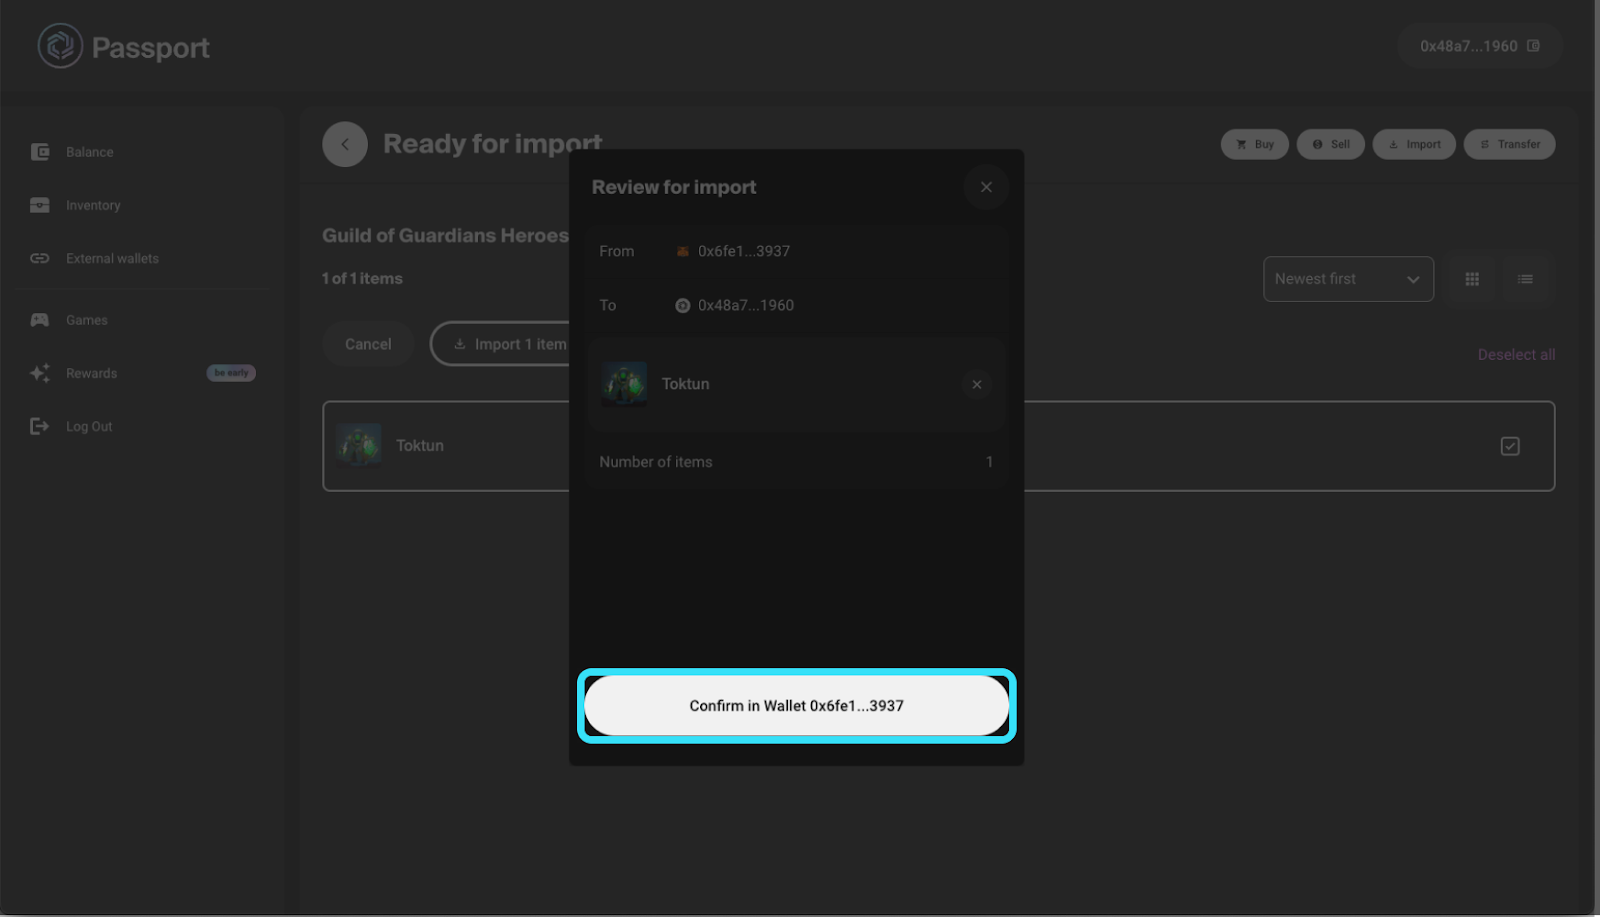
Once the transaction is confirmed, your NFT will be successfully transferred to your Immutable Passport.
Ensure smooth transfer
To ensure a smooth experience, make sure all prerequisites are met and follow the steps carefully. For further instructions on how to earn $IMX tokens for gas fees, see the official tutorial provided by Immutable.
Image source: Shutterstock
. . .
tag


